Download and install Audacity
Video guide available here, text guide available below
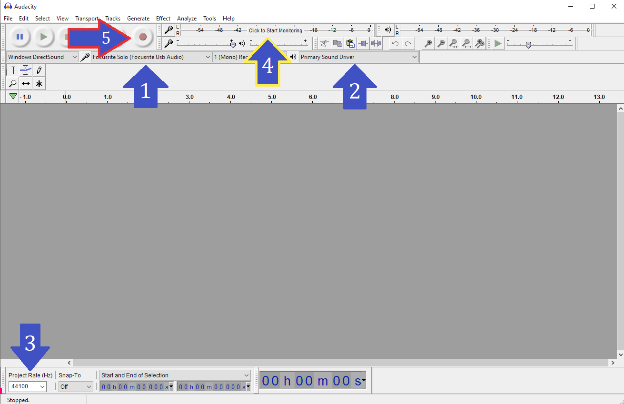
Set up your audio and configure it in 5 steps.

- Select your microphone from the drop down menu.
- Select your headset/earphones from the drop down menu
- Set the project rate to 44100
- Click to Start Monitoring to test your audio. If the bar moves, great! It recognizes your microphone
- You want the bar to be in between -18 & -12 at your normal speaking voice. To achieve this you have a few paths:
- If you are using an audio interface, you can adjust your microphone volume on the interface until it is between -18 & -12.
- If your microphone has its own volume knob, you can adjust it there.
- If you don’t have any of this, you can move closer or further away, or speak louder/softer, until you are between -18 & -12.
- If you can’t get between -18 & -12, just make sure it doesn’t red line (-6 & -0) at your normal speaking voice.
- You want the bar to be in between -18 & -12 at your normal speaking voice. To achieve this you have a few paths:
- On the day of the recording, press record when we tell you to! You’re now recording audio — hooray!